In fact, some of my most happy memories are doing just that. She was the one who taught me how to sew, how to knit, how to bake.
And, while she is good at all of those things, her favorite medium is paper.
 |
| What are these, precious? Read on to find out! |
She makes cards and journals and envelopes for the numerous letters that she writes. Indeed, I remember sitting down with her and making those envelopes out of old calenders, spending hours just crafting and talking and spending time with each other.
Such lovely times.
Now, recently, her project of choice is converting cigar boxes into wonderful works of art. Cool, right?
And, while I was on vacation, I got a chance to make boxes with her.
*happy dance*
The first step was picking out the paper. She brought two cigar boxes with her, and let me pick out a set of paper to go with each. These sets of paper included enough to cover the front, sides, and bottom of both the outside and the inside.
 |
| Here you see: the front papers of each set, the buttons that will match them, and one of the boxes to be covered. |
The second step was perhaps the most crucial to success: measuring the area on the box where the paper was going to go.
…The third and fourth and fifth steps were re-measuring. Oh, and making sure that the design was centered the way that we wanted.
 |
| Mum trying to decide where she wants the flower to go on the inside cover. |
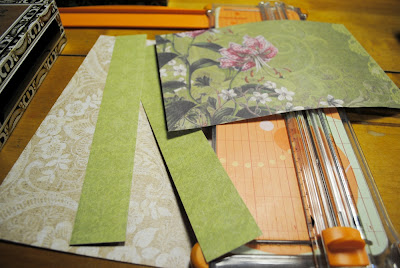
Once we were sure about the measurements, we went ahead and cut the paper (to those measurements, of course).
 |
| The first time we tried to do this, it didn't work so well... It was so humid that the paper didn't cut right! |
Then we used a cool coloring technique to shade the edges of the paper...
 |
| By shading the edges, it gives the box a more complete and cohesive look--not just disjointed papers. |
...And then glued.
 |
| See--she's a pro! |
The last step was attaching the buttons (for the pull), and the feet.
 |
| Those button make the box easier to open... |
 |
| ...And it's anchored on the inside, so it's extra strong! Also--since the boxes are wood, we had to hammer a nail through it (and then pull it out) to make the hole. Fun times! |
The lighting in the cabin, as you can tell, has a certain yellow glow... So here are some pictures of the completed boxes that I took once I got from vacation.
Here's Box 1:
 |
| The top... |
 |
| ...the inside... |
 |
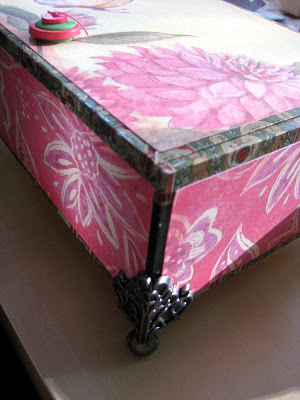
| ...and the sides. It's the box on the bottom. |
And Box 2:
 |
| The top... |
 |
| ...the inside... |
 |
| ...and the sides. |
Such a wonderful time! Not only did I get two lovely boxes (she's such a sweetheart--she let me keep both of them!), but I was able to spend some time crafting with one of my best friends.
What precious memories.
...And now it makes me want to see if I can find any orphaned cigar boxes. :)
Wow, you had a perfect crafter's vacation. And spending time with your amazing mom. Lovely. And the boxes are absolutely beautiful.
ReplyDeleteHeehee... it truly was lovely!
DeleteI love love love your heart! Your blog brings such joy!
ReplyDeleteYour lucky lucky mom
I bought more cigar boxes.:). Come visit! :)
ReplyDelete