3D Modeling Meets Jewelry Making
For the past several months, I have been hinting--repeatedly--that I was working on a very special commission.
Now that said commission is completed and received by its intended recipient, I can finally talk about it here. I have been beyond excited, and I am absolutely thrilled to be able to write about it.
Let me start by showing you the final product:
 |
| This, my friends, is a Pylon Pendant. |
And now, I will tell you how that particular pendant came to be:
It began when, last year, I was contacted by a young man who wanted to commission a very, very special Christmas present for his girlfriend.
He wanted a pendant in the shape of a very specific, very unique pylon.
Not too hard, right?
...Except I couldn't just call up the pylon store, or visit the pylon website. Otherwise, I wouldn't have been contacted about making this pendant in the first place. (Why did he contact me? Because of this listing on my store.)
So, it was immediately evident that, in order to fill the commission, I would have to make a pylon.
As I explored my options, I rediscovered that my polymer clay skills are not that impressive. (Ugh, need to work on that.)
And while my wire-wrapping and bead skills were more than competent, the best I could do was something stylized... not quite the specific look he was interested in.
 |
| I am still very proud of this prototype... it was going to go around a lovely light blue Swarovski crystal pendant. |
In all honesty, I was at a bit of a loss.
...And then my husband suggested 3D modeling.
*blink*
Say what?
Now, I had been dabbling with 3D modeling some time ago (see here)... But make a pylon? Really?
But, I decided to try it. After all, there is a website called Shapeways that you can submit designs to, and they 3D print them for you in a variety of materials... So, if I could successfully model a pylon, I could get it printed.
I played around, and was thrilled when I made something close to what I was looking for.
.jpg) |
| By golly, it's a pylon! |
.jpg) |
| Here it is again! |
 |
| Wow! I made that! |
 |
| The inside of the outer ring. |
...Perfect!
Except that the crystal was in no way connected to the outer ring.
And the little hoops didn't print--the ones on the tips, put there so that it's actually attachable to a necklace. (After all, it was supposed to be a pendant.)
So, back to the 3D model!
...And thus began the rather painful process of trying to get something that worked.
 |
| Pylon 7 couldn't be printed, because the little hoops were too thin, and so was the disc connecting the ring to the crystal. |
 |
| Pylon Attempt 12 couldn't be printed, because that blue piece was too thin. |
 |
| Pylon 13 couldn't be printed, because the pointy ends were too thin. |
I went through 17 different drafts, tweaking as I went to make something that was actually printable.
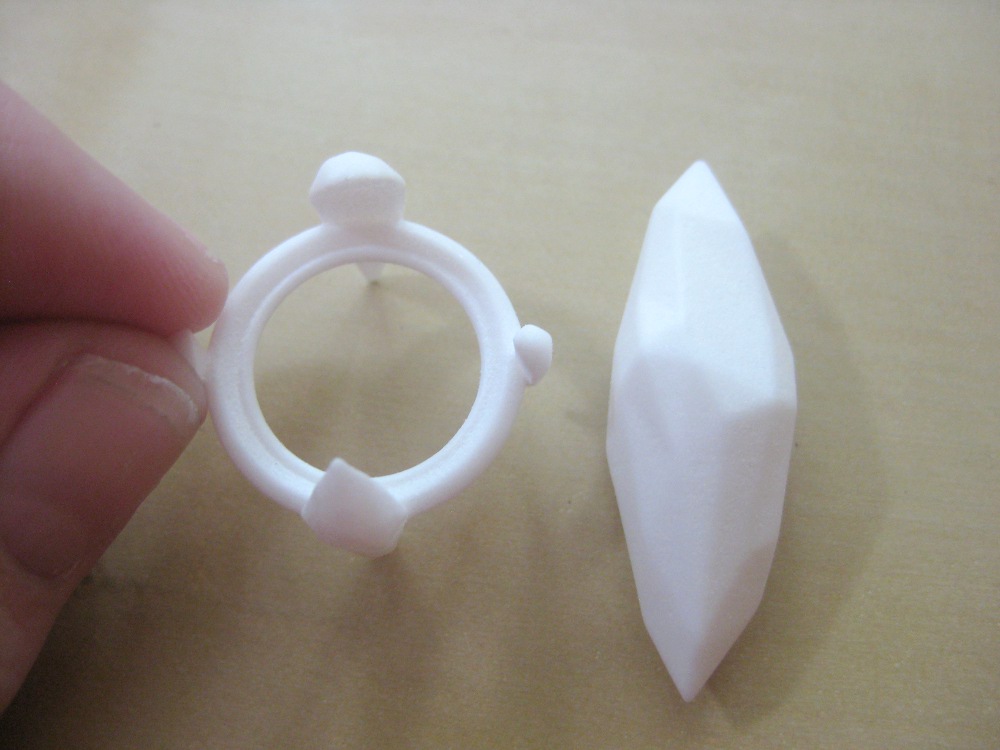
Then, finally, I came up with this one:
 |
| Pylon 17 - printable! |
Now, I'll admit that it doesn't look like much when it's on its side like that...
But look at how it prints out!
 |
| Top view. |
 |
| Side view. |
...And then, to paint it.
After all, the final pylon was supposed to be blue, with a golden outer rim. While quite stylistic, color was necessary.
 |
| To go with detail on the outer ring, or not to go with detail on the outer rim? |
And then, once the color was decided on (a combination of the different options), the final pylon came to light.
 |
| Glamour Shot! |
 |
| ...Another glamour shot! |
 |
| ...Yet another glamour shot! You can't blame me--I worked hard on this! |
All told, this process took six months, from July to December. And keep in mind that, during that time, I got extremely sick with wisdom teeth issues, my wrist was still healing from being over-knitted, and my husband broke his leg in a motorcycle accident.
Of course, I couldn't have asked for a better customer. I was sure to keep him involved in every part of its creation... I told him upfront that it would take a long time, and he was so wonderfully patient as I explored the way to make it exactly what he wanted.
And so, that is the story of the Pylon...
...thinking outside the box, trying something new, pushing myself to overcome limitations and making something pretty dang impressive. I still look at that and go, wow--I made that!
3D modeling... it's not just for computers, anymore!
P.S. In case you were wondering: the girlfriend absolutely loved it.
P.P.S. My apologies for the long entry--it's rather hard to encapsulate 6 months of work into one post!
it's my favorite pendant and i'm so very careful with it. :)
ReplyDeleteYou are so sweet! I cannot tell you how happy I was to work on that for you--it remains one of my favorite pieces that I've ever made! :)
DeleteRock on! What a process, and it is REALLY COOL. :)
ReplyDelete<3,
Andrea
Yay! Thank you so much... I'm glad you like it! <3
DeleteThis is amazing! I love the details in the post...Great Job!!!
ReplyDeleteThank you so much! I'm glad that amount of detail wasn't too overwhelming... There was just so much to cover!
DeleteI really appreciate the comment! :D
Great Job!!!
ReplyDelete