Friday, September 30, 2016

Wonder and Whimsy Monthly Challenge - September Reveal

It's the last Friday of September, and you know what that means! That's right--it's time for the reveal of September's Wonder and Whimsy Monthly Challenge!

Hurray!

As a refresher, this month's challenge is all about paper pulp beads. As I described in a previous post, I took some leftover packing paper and turned it into hand-shaped beads:


...And so this challenge was all about making jewelry with those beads!

First things first, though: in order to make jewelry out of those beads, I needed to paint them. 

And paint them, I did!

Ah, yes, painting beads in the basement.
Not the best lighting, but a wonderful amount of space to spread out!

I had a lot of fun deciding what colors (and color combinations!) to use. I mostly used craft paint, but I also mixed in some nail polish for fun.

Once the beads were colored to my liking, I then added 3-4 coats of exterior/interior gloss varnish. The hope was to make them water resistant, smooth to wear, and less likely to rub off--and the varnish seems to have done the trick!


So, those are the beads! Now, to show off what I made with them!

There are six sets to show off overall. I tried to vary up the styles, just to get an idea of how versatile these beads are. I admit to being a little stumped at first--I really am used to using smaller beads, and these beads are quite chunky. In the end, though, I started to warm up to their girth. I'll let you decide how well I did in using them! :)


Necklace Set #1


This is the first set that I made, hand knotted on waxed linen. The chunky copper/bronze paper beads are interspersed with some glass, crystal, and dragon vein agate.


I am very fond of this color combination, as well as the mix of textures. 

I'm also particularly fond of the earrings that I made to match. They are light weight and eye-catching, and capture the textures of the necklace very well. And what can I say--I'm definitely a sucker for matching sets! (I know that this is a huge surprise, ha!)


Necklace #2


This second set was made by mixing things up a bit. 

Instead of sticking with one color theme, I chose a few different colored beads and put them together in a random pattern. I then strung them together using simple wire links, and finished the design off with two different colors of chain (gunmetal and silvertone).


The fun part of this necklace, for me, is how it combines the beads painted with craft paint (silver, lavender, and plum) as well as the ones painted with nailpolish (dark blue and iridescent green/purple/peacock). The different finishes give even more depth to an already texture-filled necklace design.


Necklace Set #3


This set is made all with the same color paper beads--two shades of lavender and purple, finished with a metallic silver sheen. The beads are strung on beading wire, and are graduated from small to large (with the largest beads at the center).

A simple construction, perhaps, but one designed to showcase the beads themselves.


Necklace Set #4


As you can tell, this set is very similar to the previous one--just a different color scheme. Instead of lavender and silver, this set is plum and copper (with a fancy toggle clasp to match). 

It, too, has graduated beads, and it, too, is strung on beading wire. Simplicity at its finest. And what can I say? I really love this shade of purple! 

  
Fun sidenote: If you look closely, you can see that the plum beads actually have a copper shine to them! Just an extra layer of depth I added while painting them. *grin*


Necklace Set #5


It's no surprise that I really like tassels. In fact, when I started this challenge, I knew that I wanted to make at least one tassel design.

The result is this set--which boasts not one, but three tassels. That's right... the earrings were an added bonus! 


There is nothing shy or apologetic about this set... and I love it. The earrings and necklace both are delightfully lightweight and have a fantastic amount of movement. I've always been a fan of silver and black together, and I think this set combines those elements well. 

...A good set for those days when you just need a tassel. (Am I the only one that has those types of days? Heh.)


Necklace Set #6


While the other designs were mostly planned (I didn't know the specifics, but had a general idea of what I wanted), this last set just sort of happened. I painted the bluish beads and the reddish beads expecting them to end up in separate necklaces... but then one thing led to another, and this necklace came into being.

...Well then.


The pendant is actually one that I had picked out for my Maya challenge, but seemed perfectly suited for this set. The whole thing is strung on beading wire, and matched with silvertone findings and green Czech glass rounds.

I am actually very happy with how it came together... Although I admit that I might remake it with brass or copper findings instead of silver. We'll see--the jury is still out on that one.


Oh! And the beads? 

They glow in the dark:

A horrible picture, but they really do glow!
(I was up in the middle of the night trying to capture this phenomenon,
much to my husband's amusement.)

To make them glow, I used a coat of glow-in-the-dark nail polish I picked up while visiting my parents. It muted the overall color of the beads, but I still like the finished look. It does make them rather hard to photograph, though!


So, there you go!

That's what I made for my September Monthly Challenge--from start to finish! I think I finally hit my stride by the fifth or sixth set... And you, know, it's rather silly. When I finally started thinking of them as artisan beads--not just as a silly experiment--did the design ideas start pouring in. I guess it really is all a matter of perspective!

Thank you so, so much for stopping by today to see what I made... Stop by in a few days to see what I end up doing for October's challenge!

Have a wonderful Friday, everyone!

Wednesday, September 28, 2016

Wednesday's Worktable

Hi! Contrary to what you might think, I haven't disappeared off the face of the Earth!

I do apologize for missing last week's worktable post, though. I was out of town. In fact, last week, I had the amazingly good fortune to be able to go see my family in Maryland. I am truly lucky to have a family I love--and that I enjoy spending time with! I am full to overflowing, and so glad that I got to go.

Rainy in the mountains--the entry into Maryland.

...That also means that now I'm staring at the pictures and memories that I want to share, and feeling quite overwhelmed. I went to the Baltimore Museum of Art with my mother. I went to the Maryland Renaissance Festival with my sister. I spent time watching college football with my dad.

And there was so much bead shopping!

Table of beads!
...I wish I had an A.C. Moore here in Cincinnati!

I am exceedingly grateful for the wonderful people I know: my family and friends in Maryland, and the wonderful husband, in-laws, and friends I have here in Ohio. I live a ridiculously beautiful life, and I never want to take it for granted.

...So, on my worktable today is simply this: unpacking from my trip, preparing for Friday's Monthly Challenge reveal, sorting through pictures, and settling back into my craft room. All while listening to the sounds of rain, and reveling in the cooler temperatures of Autumn.

I am content.

Happy Wednesday, everyone!

Wednesday, September 14, 2016

Wednesday's Worktable

I have the cold that won't quit.

...Blah.

Oh well. At least I do have something on my worktable this week, even though I am not feeling all that great. My worktable project is even related to my September Monthly Challenge... Imagine!

So, what am I doing, you ask? 

I'm painting paper pulp beads!

Everything I need to paint the beads, neatly laid out on my back porch.

...Granted, the above picture shows how I started painting the beads. Then it started to get too windy, and my materials were getting blown every which way.

So, I moved my bead painting station to the non-photogenic table in the basement: 


...and there it has remained.

I've been having great success, though! I have painted five colors of beads so far--mostly with craft paint, although I have also been playing around with nail polish. (Because, why not? *grin*) I'm even getting to the point where I can actually start designing with the finished beads... Yay!

So, there you go! That's what I have been up to this week--painting beads in the basement.

Thanks so much for stopping by... Have a wonderful Wednesday, everyone!

Monday, September 12, 2016

Wonder and Whimsy Monthly Challenge - September Edition

I realize that I'm late in announcing my Monthly Challenge (again), but never fear--I do have a September project that I'm working on. Hurray!

So, what is it? 

Well, this month's challenge all starts with packing paper...

We moved almost two years ago, and I still have piles of this stuff.

...which I have made into beads!

Here they are!
They still need to be sanded and painted, but here they are!

...Now, I actually made these beads back in February/March. I even blogged about it! (The entry is here, if you're interested.) I haven't done anything with them, however... I've been super busy doing everything else, and they've been pushed to the side.

That is about to change, however, because my September challenge is to make something with them now! Yay!

Now, if you're curious, here is how I made the beads... You know, in case you want to play along! (Or if, like me, you just have tons of scrap paper lying around that you want to use. I've done this with both packing paper and phone book pages, but I'm sure it will work with most things paper. Oh, and I roughly followed the instructions found on this website--although I mostly just made it up as I went along.)

So! To start with, I shredded the paper sheets into smaller pieces and put them in a sauce pan: 


...Which I then covered with boiling water, and let sit for about an hour or two to start breaking down the fibers:


After soaking for a good amount of time, I put the mushy pulp into the food processor and gave it a few pulses. The goal was to break down the individual pieces and make it more of a fibrous dough.


I then squeezed the excess water out of the pulp (seen on the left) and added some ModPodge as a binder (seen on the right):


The directions I found online suggested Elmers or any type of glue that dries clear... ModPodge is what I had on hand, so that's what I used. It seems to work pretty well, too, so I don't have any complaints. 

I then mixed it by hand to create this concoction, which became the dough I used for the beads:


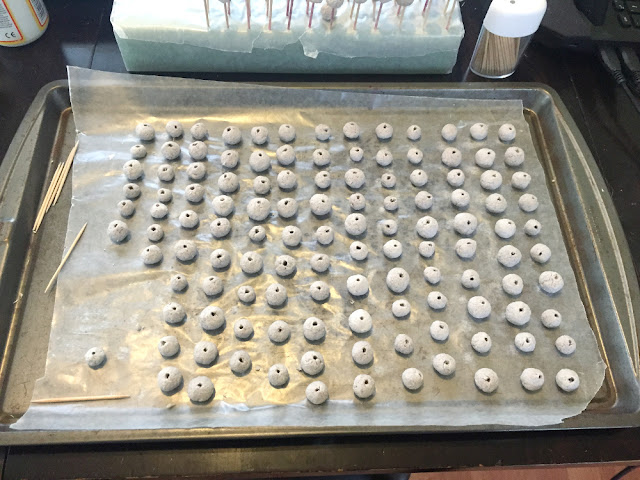
I then pinched off small sections of dough and hand-formed them into balls. They aren't perfectly round because I had to form them with my fingertips... Rolling them made them fall apart. Still, their irregularity gives them handmade charm, right? :)


Then, I let the beads sit for about a half hour. Once they dried just a bit, I went through and added the holes with a toothpick. 

One. At. A. Time.


It was a bit of trial and error, honestly... If the beads were too wet, they would just fall apart and I had to reform them around the toothpick. If they were too dry, it was harder to punch the holes and I was more likely to just ruin them. I often erred on the side of too-wet, which meant that it was a long and rather tedious process... But, all in all, they turned out all right!

Oh, and as a side note: the website that I referenced earlier just uses a drill to make the holes once they're dry... Without a drill, though, I used what I had on hand. Improvisation and all that. :)

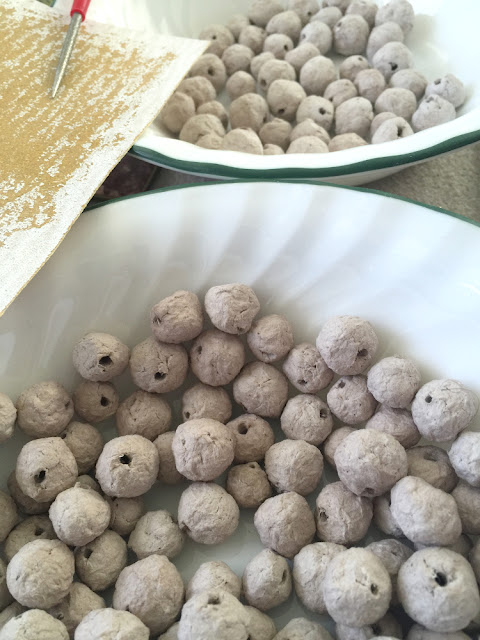
Once the beads were completely dry (I waited about 3 days), I sanded down the rough edges...


...And came out with these:


So, there you go! That brings me to where I am now: with a pile of dried and sanded beads, just waiting for me to paint them and actually make jewelry with them!

...And make jewelry, I will! 

Come back on Friday, September 30th to see what I have made!