So, what is it?
Well, this month's challenge all starts with packing paper...
 |
| We moved almost two years ago, and I still have piles of this stuff. |
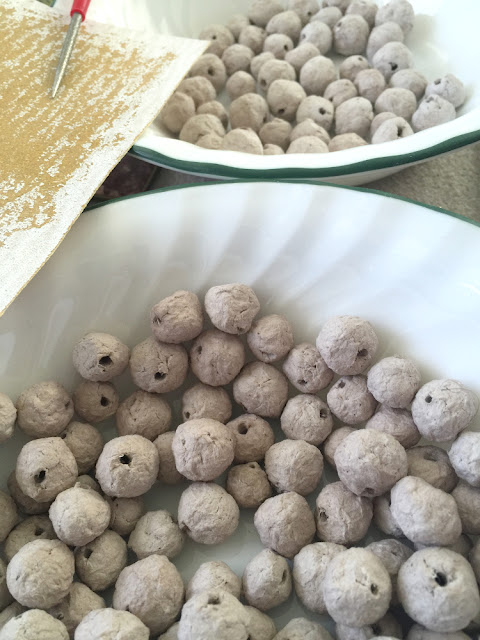
...which I have made into beads!
 |
| Here they are! They still need to be sanded and painted, but here they are! |
...Now, I actually made these beads back in February/March. I even blogged about it! (The entry is here, if you're interested.) I haven't done anything with them, however... I've been super busy doing everything else, and they've been pushed to the side.
That is about to change, however, because my September challenge is to make something with them now! Yay!
Now, if you're curious, here is how I made the beads... You know, in case you want to play along! (Or if, like me, you just have tons of scrap paper lying around that you want to use. I've done this with both packing paper and phone book pages, but I'm sure it will work with most things paper. Oh, and I roughly followed the instructions found on this website--although I mostly just made it up as I went along.)
So! To start with, I shredded the paper sheets into smaller pieces and put them in a sauce pan:
...Which I then covered with boiling water, and let sit for about an hour or two to start breaking down the fibers:
After soaking for a good amount of time, I put the mushy pulp into the food processor and gave it a few pulses. The goal was to break down the individual pieces and make it more of a fibrous dough.
I then squeezed the excess water out of the pulp (seen on the left) and added some ModPodge as a binder (seen on the right):
The directions I found online suggested Elmers or any type of glue that dries clear... ModPodge is what I had on hand, so that's what I used. It seems to work pretty well, too, so I don't have any complaints.
I then mixed it by hand to create this concoction, which became the dough I used for the beads:
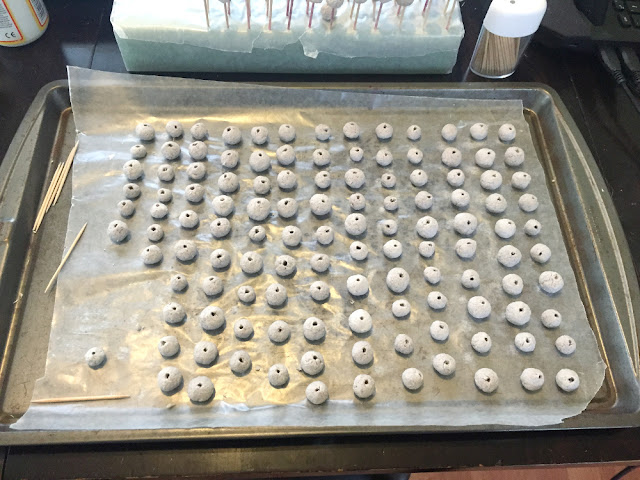
I then pinched off small sections of dough and hand-formed them into balls. They aren't perfectly round because I had to form them with my fingertips... Rolling them made them fall apart. Still, their irregularity gives them handmade charm, right? :)
Then, I let the beads sit for about a half hour. Once they dried just a bit, I went through and added the holes with a toothpick.
One. At. A. Time.
It was a bit of trial and error, honestly... If the beads were too wet, they would just fall apart and I had to reform them around the toothpick. If they were too dry, it was harder to punch the holes and I was more likely to just ruin them. I often erred on the side of too-wet, which meant that it was a long and rather tedious process... But, all in all, they turned out all right!
Oh, and as a side note: the website that I referenced earlier just uses a drill to make the holes once they're dry... Without a drill, though, I used what I had on hand. Improvisation and all that. :)
Once the beads were completely dry (I waited about 3 days), I sanded down the rough edges...
...And came out with these:
So, there you go! That brings me to where I am now: with a pile of dried and sanded beads, just waiting for me to paint them and actually make jewelry with them!
...And make jewelry, I will!
Come back on Friday, September 30th to see what I have made!


No comments:
Post a Comment
Thank you so much for taking the time to comment! :)