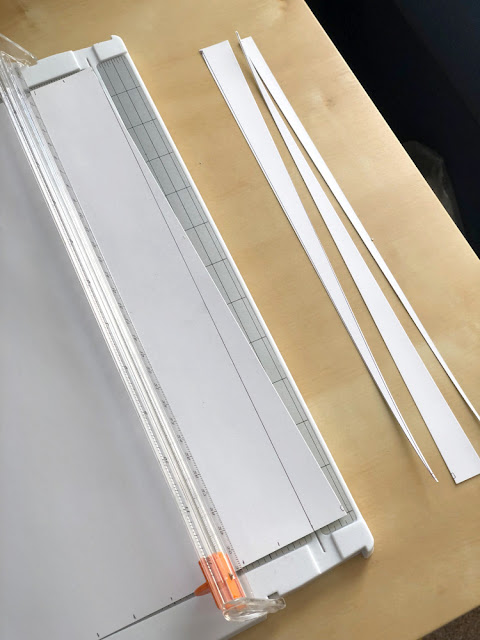
So, here you go... my very first Wonder and Whimsy tutorial! Woo!
Step 1:
Gather materials
To cut the strips for my paper beads, this is what I use: the paper in question, a ruler, a writing implement, and a paper cutter.
I use all sorts of paper for my beads--from junk mail to sketch paper, and everything in between. In general, the thicker the paper, the thicker the bead will be. For this demo, I used a 12 x 12 piece of scrapbooking paper.
Step 2:
Measure and mark
In general, I make my beads 3/4 of an inch long. (I find that one inch is a little too big, and a half inch is a little too small. So! 0.75 inch, it is.)
So, for this step, I turn my paper over to the back, put my ruler to the bottom of the paper, and put a mark at every 3/4 of an inch. Simple enough. :)
Step 3:
Measure and mark, round 2
The paper bead strips I make are essentially very long, skinny triangles.
So, after the first side is completely marked, I turn the paper around so that I'm now dealing with the parallel side. The idea is that I am now going to mark the other side of the triangles.
For this reason, the first mark that I make on this side is actually at 0.375 of an inch--half of 0.75 inches. My ruler makes this super simple, but eyeballing it is fine.
Once that first mark is down, I then measure and mark at 0.75 inch intervals--just like I did on the previous side.
When I'm done, this is what it looks like:
That is probably the most boring picture I have ever posted on my blog--hah! Hopefully it still helps show what I mean. Oh, and I put a little box on top of the very first mark I make, just so I know how to orient my paper... That little box is always in the bottom right. It's not essential; it just helps me keep everything straight in my mind.
Step 4:
Connect the dots
Essentially, this is the step where lines are drawn to connect the little marks on either side of the paper. This forms the skinny triangles that become the strips.
For this step, I put the bottom of the ruler on the edge of the paper, and the top of the ruler on the first 0.375 inch mark that I made. This line is diagonal; this is one side of the triangle. I trace that first line.
I then leave the top of the ruler where it is, and shift the bottom of the ruler over to the next mark (in this case, the one where I drew the box). I trace that line. Then I shift the top of the ruler over to the next mark, leaving the bottom of the ruler in place, and trace that line. I repeat this zig-zagging down the length of the paper, until each pair of lines have been drawn--and the paper is full of triangles.
Do keep in mind that this step is purely optional. In fact, I rarely do it. I've done this so much that these lines are no longer necessary for me. Still, it would probably be good to do until you feel comfortable visualizing the strips. You'll notice that in the pictures to come, I've only drawn a few of them. :)
Step 5:
Cut
And now, it's time to cut! Yay!
This is where I line up the end marks with my cutter, and slice along the line that has been drawn.
Now, I mentioned that I hardly ever draw the lines. Instead, to cut, I simply line up the top and bottom marks, and slice where the line would be:
Here is another picture, to hopefully give you a better image of what it looks like:
Just as when I was drawing the lines, I zig-zag down the paper. Above you can see the end result, with half of the strips facing one way, and the other half facing the other.
Step 6:
Yay! Paper Strips!
Once all the strips are cut, I then turn them over and stack them up. And, ta-da, that's it! That is a quick and simple way to cut paper bead strips.
...Actually rolling and sealing the beads, well, that's for another tutorial. (And for when I get another pair of hands, because actually making the beads and taking pictures at the same time--hah! People who do tutorials have my utmost respect.)
I do hope that this has been helpful. If there are other tutorials that you want me to try to make, please let me know! I can't guarantee that I'll be able to do them (see previous statement about needing more hands), but I'd love to hear your ideas.
Thanks so much for stopping by today... Have a wonderful week, everyone!


Great first tutorial! While I'm familiar with the process, I like how you've broken down the steps to make them plenty clear for anyone who isn't. Great job!
ReplyDeleteGreat job!! I am going to make some beads today using your measurements. You made it very easy to understand!! THANK YOU SO MUCH FOR DOING THIS!!!!!
ReplyDelete